Wireless Data transfer
The JedEye offers two distinct modes for wireless connectivity:
- Access Point Mode (AP): The device creates its own WiFi network. You connect your phone or laptop directly to the JedEye's network to access data.
- Station Mode (Local Network): The device connects to an existing local WiFi network (like your home or office router). This allows you to access the JedEye while remaining connected to the internet.
The JedEye as Wireless Access Point
Navigate to OPTIONS > WIFI > WIFI AP(OFF) and select the entry.
This will create a wifi network to which you can connect any of your devices equipped with a webbrowser.
When the wifi is on an icon ![]() will be displayed in the upper croner of the screen.
If not connection occur during 5 min the wifi will automatically turn off to save battery.
will be displayed in the upper croner of the screen.
If not connection occur during 5 min the wifi will automatically turn off to save battery.
In the OPTIONS > WIFI menu you'll find an entry called Wifi Start. When this is on the Wifi will be automatically on during 30s when the device starts. If no connection happens it will turn off.
The wireless network created is ( SSID: JedEye Password: password), connect your device and navigate to http://192.168.4.1 (as displayed below the main menu).
Scan to connect (QR codes)
From firmware v2.4.2, turning on the access point shows QR codes on the screen so you don't have to type anything:
- Join QR — point your phone's camera at it to join the JedEye WiFi network directly (no need to type the SSID or password).
- Open-page QR — as soon as your phone connects, the screen switches to a
second QR (with the address
http://192.168.4.1printed below it). Scan it to open the JedEye web interface in your browser.
The QR screen clears by itself once the page has loaded, returning the device to the main menu. You can also dismiss either QR with the NEXT/SELECT buttons.
On many phones the web page opens automatically the moment you join the network (the same "Sign in to network" prompt you see on public WiFi). Some phones — typically newer Android versions — don't trigger this; on those just scan the open-page QR (or type
http://192.168.4.1), which always works.
This is the landing page on a phone:
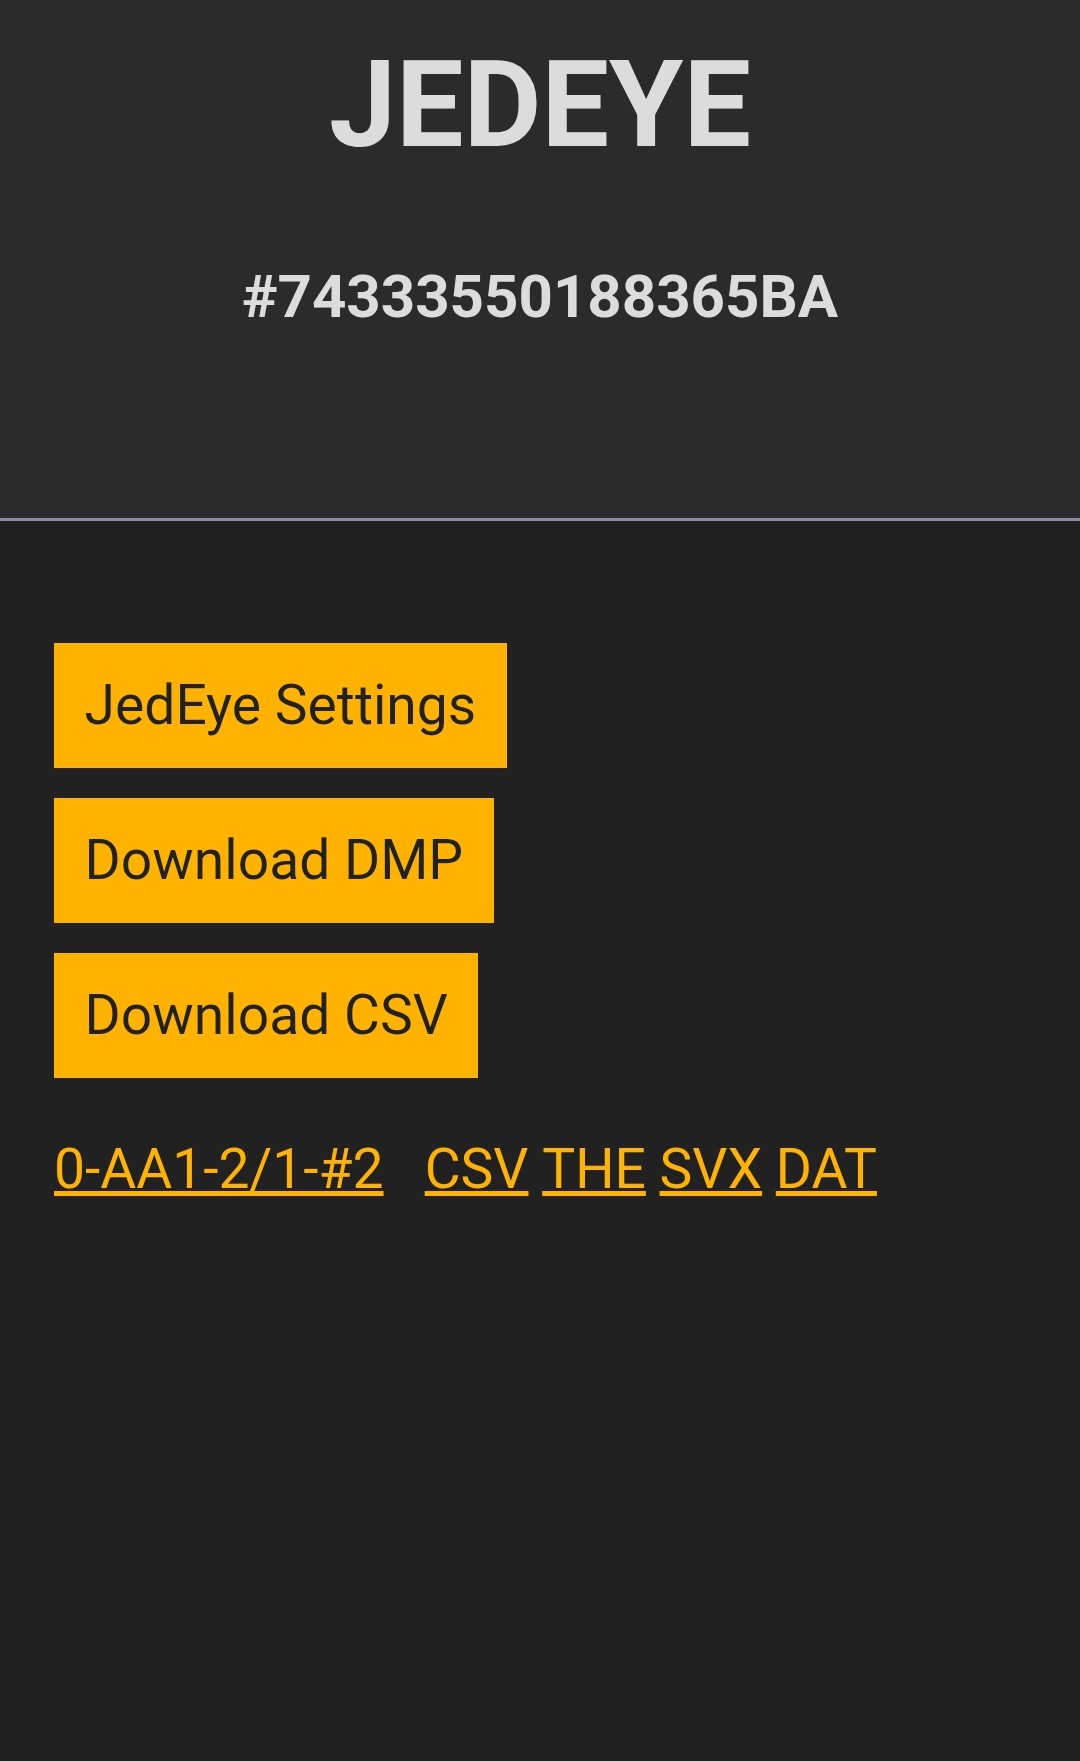
From this web interface, you can download your survey data in various formats:
- Download DMP: Raw memory dump for backup/debugging.
- Download CSV: Comma-Separated Values file for general use.
You can download individual section surveys in THE, SVX, or DAT formats by clicking the links next to each entry in the history list.
Survey Views (2D and 3D)
Each entry in the history list also has a View button that opens a vector (SVG) map of that survey directly in the browser, with the lidar outline drawn around the survey path. From there, a 3D button switches to an interactive 3D view that renders:
- The survey path coloured by depth (blue = deepest, red = highest).
- The full per-shot lidar point cloud.
- An auto-scaling ground grid (centimetres or metres depending on the survey extent).
- A small compass-rose widget showing the East, North and Up axes.
Controls in the 3D view:
- Left-drag rotates (azimuth + elevation orbit).
- Right-drag dollies the camera closer to or further from the scene.
- Scroll wheel or pinch zooms by focal length.
- Click on a station to re-centre the orbit on that point.
Both views are served entirely from the device — no internet access is needed, so they work in Access Point mode.
Remote Control
From firmware v2.5.0, the landing page has a Remote control button that opens a live remote for the device. It shows:
- A live copy of the JedEye's screen, rotated to match the device and refreshed about once a second.
- SELECT and NEXT buttons, laid out like the physical ones (SELECT on the left, NEXT on the right).
Tapping a button does exactly what pressing the matching button on the device would — the JedEye can't tell the difference — and the on-screen copy updates right away so you can follow where you are in the menus. This is useful when the device is mounted out of reach or tucked into a harness, or when you simply want to navigate without touching it.
Like the rest of the web interface, the remote is served entirely from the device, so it works over Access Point mode with no internet access, as well as on your local network (Station Mode).
Connecting to a Local WiFi Network
The JedEye can also connect to an existing local WiFi network (Station Mode). This is useful when you want to access the device's web interface without disconnecting your computer or phone from the internet.
- Activate Station Mode: Navigate to OPTIONS > WIFI > WIFI ON(OFF) and select it to toggle it to ON.
- Connection Process: The device will scan for available networks and attempt to connect to any network credentials stored in its memory (managed via the JedEye Settings Webpage).
- Find IP Address: Once connected, the IP address assigned to the JedEye will be displayed on the device's OLED screen (e.g.,
IP:192.168.1.50). - Access Interface: Enter this IP address into your web browser to access the JedEye interface.
From firmware v2.4.2, once the device connects it also shows a QR code with its web address — scan it from any phone or computer on the same network to open the JedEye page without typing the IP. The QR clears once the page has loaded (or on a NEXT/SELECT press).
Note: If no known networks are found or connection fails, the WiFi will turn off automatically to save power.
JedEye Settings Webpage
From the main page, clicking on JedEye Settings opens a configuration page where you can adjust various device parameters (Date-Time, Stabilization, Sensitivity, etc.) and manage local WiFi connections.
WiFi Network Management
This section allows you to manage the list of known WiFi networks that the JedEye can connect to (Station Mode).
- View Networks: The WiFi Networks table lists all saved SSIDs.
- Add Network: Use the Add Network form to save a new WiFi network by entering its SSID and Password.
- Remove Network: Click the Remove button next to a network name to delete it from the device's memory.
- Clear All: The Clear All Networks button removes all stored WiFi credentials.
Note: Changes to WiFi networks are saved immediately to the device's persistent memory.